Waldo Codes

Pragmatic insights on software craftsmanship and other topics.

Learning to code can feel overwhelming. In this post I'll outline a few strategies for success. If you have ever learned to play a musical instrument you would understand the need to practice. Coding is the same way. You will learn best by writing code.

I often need to learn new things. My favorite technique is immersion. Jump in, and work on small goals. Overcoming small obstacles gives me motivation to keep learning. You may find it works well for you too. Let's look at an example of how that works.

To learn a new programming language (Python), I would first find my goal. Something easy enough to understand, yet complex enough to drive your curiosity. Often I choose to write a simple command line game. For example, Hangman. Do not choose complex goals while learning. If you do your mental energy will be wasted thinking through the details of how to reach your goal. Keep it simple.

Once you have your goal, break it down into small parts and focus on one part at a time. Write down a list of what you need to make a Hangman game.

Hangman Component List – Draw a little stick person a part at a time – Word list to randomly choose from – Get user input – Display output to the user – Limit user letter guesses to the number of stick person parts – Winning: user guesses the word, before using all guesses – Loosing: more letter guesses than the number of parts in the stick person

At this point you can pick one little thing to focus on. Perhaps start by figuring out how to code up a list of words. Next figure out how to make a function to randomly return one word. Then look into how to get input from a user.

As you work on each part of your goal, you will be forced to research things. – How do you make a list of words in Python? – How do you randomly select an item from a list in Python? – How do I get user input from the command line?

This method focuses mental energy into accomplishing small wins. During the process of researching jot down things that you are curious about. Go back and read more on those things. If you are learning something entirely new, this will quickly become a large list. Focus on the small easy wins. How do you eat an elephant? One piece at a time!

Focusing on small steps helps to avoid becoming overwhelmed. Researching and reading on topics you don't understand will quickly build your knowledge. Wisdom will come as you continue to write code. Get started, then stick with it!

Several years ago, I read Clean Code: A Handbook of Agile Software Craftsmanship by Robert C. Martin also known as “Uncle Bob”. If you haven't read it, you might consider picking up a copy. It inspired me with a desire to write cleaner higher-quality code. The book is not technical, rather it focuses on the processes and mindset necessary to create clean code.

Uncle Bob has also created a video series that goes beyond the material covered in his book. The videos dive into technical aspects of how to write clean code. I started watching the video series from the beginning. The format is entertaining and the material is thought-provoking.

So far I've watched four episodes and I've been thoroughly entertained and inspired. Episode 1 talks about how we write code for humans, not just machines. The second episode talks about class, and function names. The third and fourth episodes dig into functions.

If you're looking for an entertaining way to get knowledge this may keep your attention. I look forward to carving out time to watch more Clean Code videos!

Dependency Injection (DI) is a very useful pattern. It makes a class's dependencies obvious. If dependencies are not provided, the class can't be created. When testing, it allows the internal dependencies of a class to be swapped out for mock objects. It is a best practice when trying to write decoupled testable code.

When using the DI pattern in a codebase you would wire together all the dependencies in the application root. To avoid manually wiring up dependencies you may turn to a DI container framework such as AutoFac or Ninject. DI frameworks handle all the heavy lifting of wire-up.

At this point you may be wondering what this has to do with creating a published code API? When you consume an complex API as a user, you don't want to have to wire up all the internal details. Here is a contrived example.

// This will drive an API consumer crazy
public class TheAPIConsumersClass {
    Airport WireUpTheShinyNewAirportAPI() {
       var runwayLights = new Array<BrightLight>() { new BrightLight() }
       var radar = new RadarUnit();
       var controlTower = new ControlTower(radar);
       var airport = new Airport(airplane, controlTower);
       return airport;
    }
}

 // All your user really wants to do is this something like this...
public class TheAPIConsumersClass {
    Airport WireUpTheShinyNewAirportAPI() {
       var airport = new Airport();
    }
}

If you don't hide the wire-up details from the users, you may wish you did when they start calling with questions. There are a few things could be done here. One is to create a factory class for users to call. For a very complex dependency graph, this might be your best option. Here is another approach. Mark the constructor with dependency injection as internal. Have a public constructor that calls the internal constructor and provides the required dependencies. This way you can get the benefit of DI for testing, while still providing a simple constructor for consumers.

public class MyApi {
   public MyApi() : this(new Thing1(), new Thing2()) {  }
   internal MyApi(Thing1 thing1, Thing2 thing2) {
          _thing1 = thing1;
          _thing2 = thing2;
    }
}

Overall, when creating an API consumed by others be kind. Don't require them to do the complex dependency graph wire-up. Provide top level classes that hide details and make the library simple to use. Keep your DI, just don't make it public. In this case you can have your cake and eat it too.

AutoMapper is useful tool. Saves serious time in the mapping of object properties between different classes. Objects are mapped when moving between layers of your application. This helps to maintain clean separation between the layers.

Like any other framework that has been around for a while it's undergone some changes. For several years AutoMapper shipped with a static API. Jimmy Bogard (creator of AutoMapper) has a few posts on his blog that gives the details.

AutoMapper and IOC

More recently the static API has been removed from AutoMapper.

Removing the static API from AutoMapper

In our codebase we moved to the newer version of AutoMapper with the IoC friendly API. It brought a few issues to the light.

Where does the Map Function live? The obvious answer is you would have a line either a controller or a command. In this case moving from the static API to a mapping service isn't a huge leap. It only requires injecting a mapper instance.

// Maps from Domain Object to DTO
//Static
OrderDto dto = Mapper.Map<Order, OrderDto>(order);
 //Static
OrderDto dto = _mapper.Map<Order, OrderDto>(order);

Backing up a little, how would you do the mapping without AutoMapper? A simple map function would do the trick.

public static OrderDto Map(Order obj) {
    '''... // all the mapping
    return oderDto;
}

That map function only requires the objects being mapped. No external dependencies. It's pass through code for unit tests. That function can live almost anywhere in the code base. Though I'd argue there are more and less correct places you'd expect to find it.

In our codebase I developed a pattern with generics to handle add and update of data for CRUD functions. Two interfaces define the mappings for add and update. IMapTo used for add and IMapOnto used for updates. If a model implements either or both of these interfaces I can wire up a generic command that does all the hard work. Code reuse at its best.

IoC in my Models No thanks. While the static interface made this plausible. The IoC interface makes this a little painful. The mapper instance could be passed into the model function via parameter injection. That felt messy and required injection into the top level. I've created a static factory that returns my mapping instance.

 public Order MapOnTo(Order state) {
     var mapper = new    MapperFactory().CreateMapper<OrderMappingProfile>();
     return mapper.Map(this, state);
}

For now this works fine, but serves as an example of why the static mapper had its place in the API. RIP static mapper :(

Other Options It is also worth mentioning that there are other mapping frameworks that you might want to look at. The most interesting that I've seen to date is Mapster

For the past year and a half, I've been working on a large GIS web application. At its backbone is ESRI technology. Here is a brief overview of our tech stack.

ArcGIS Server hosts service endpoints that are the API for our client application. The application is built with ASP.Net MVC and houses an Angular SPA. The MVC part of the application hosts a proxy . The proxy enables secure communication with the ArcGIS Server.

The ESRI Resource Proxy was written a while back. It's packaged in a .ashx file with several methods going beyond a hundred lines of code. While there is no doubt that this is a marvel of ingenuity it's glory days where likely over 10 years ago. You don't have to read far before realizing that some very basic refactoring would do this proxy a world of good.

Early in development of our system, I had forked and modified the proxy. We had some issues in our environment that the proxy couldn't handle. With OAuth2 flows the proxy assumed that the token endpoint would allow anonymous traffic. When ArcGIS Server used Integrated Windows Authentication (IWA) to secure the token endpoint, the proxy does not pass credentials. This a generally reasonable assumption, but not true in our environment. I forked the code and set about to fix it.

In the process I discovered several other issues. One such issue was the code calling an authorization endpoint with incorrect parameters. The code doesn't have unit tests. Reading the issues section on Github makes one loose confidence in all 1250 lines of proxy code. Now that I've presented a picture of the code quality, lets get into the more bizarre.

ESRI products aren't open source. The license costs are rather high. If you build an application with ArcGIS server and a client side code, as of now you need the proxy. It is not an optional chunk of the stack.

ESRI has taken the position on Github that the proxy is a community supported effort. Furthermore, they have stated that they will not be creating a proxy for .net core. Not much point to customer support when you have a monopoly.

We migrated our code from full framework to ASP.Net core. In the process I did something the ESRI team should have done. I wrote a resource proxy for .net core. You can find it on Github and as a NuGet package.

The .Net Core proxy includes a built in memory cache. If you are running a load balancer, fork the project and replace the cache provider. Or submit a PR to make the cache provider configurable. :) The code has unit tests, and uses the new HttpClientFactory in .Net Core.

If you can manage getting away from ESRI products do it!

Happy Coding!

(Update): ESRI has since updated their Github proxy page to outline new approaches. Though they don't give enough information to really understand what any of the approaches mean.

Auth0 is a great solution for authentication. Swagger-UI is great for kicking the tires on your API. If your using .Net you can pull in Swashbuckle, which is a .Net wrapper of Swagger. In development I use Swagger often and I found that the Authorize step was tedious. I would use another API client like Postman to call Auth0 API. Executing an implicit grant flow, in Auth0 yielded an Auth token which is copied to the clipboard. Then I'd click the Authorize button in Swagger and type Bearer and paste in my token. Exhausting! In this post I will show you a little trick that will make life simpler.

The Authorize button in the top right corner of the Swagger page is configurable. The sad part is that currently Swagger-UI 3.17.6 doesn't play well with Auth0. Short story is Swagger does not support the passing of an audience parameter. Here is a Github issue with the details.

Given the situation with Swagger-UI. I thought of forking Swashbuckle and patching things up. This seemed tedious and I tend to fork only as a last resort. I settled on a pragmatic but not all that clever solution. I realized Swashbuckle would let me replace the version of Swagger-UI it comes packaged with. That would let me add in a little hack to create a cleaner authorization workflow.

In the image below you can see an extra button in the UI. [Get Auth Token]. 
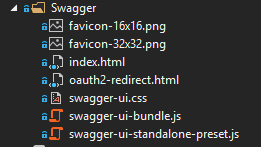
This button hits the API endpoint which redirects to Auth0. The user logs in, and is redirected back to the Swagger-UI endpoint. The token is in the URL, and gets extracted and shown in a prompt for the user to copy to the clipboard. The user then clicks the Swagger Authorize button. When the Swagger Auth dialog appears they paste the clipboard contents into it. This is much quicker!

The secret to getting this working is Swashbuckle allows you to specify a new index file. Download the Swagger-UI source from Github and keep the following files. Set the index files build action to embedded resource in Visual Studio.

  • favicon-16x16.png
  • favicon-32x32.png
  • index.html
  • oauth2-redirect.html
  • swagger-ui.css
  • swagger-ui-bundle.js
  • swagger-ui-standalone-preset.js

Replace the body of the code in index with the code body of the index file from this Gist. Note: the rest of the code you'll need to wire this in should also be in the Gist. If your using Swashbuckle override the default index with your modified file by setting the IndexStream in the config.

c.IndexStream = () => GetType().GetTypeInfo().Assembly.GetManifestResourceStream("Project.API.Swagger.index.html");

Hopefully, someday something similar to this will be supported natively in Swagger.

Happy Coding!

Developers have used different methods to inform users of changes for some time. Some put git commits into into a text file and package it with the app. Others may forgo any formal change notification. In one case you can over inform users (git commits) and then again no change tracking is just as harmful. You want a goldilocks type solution. Keep a Changelog.

The procedure and formatting around the Keep a Changelog template make it stand out. Most developers are already familiar with Markdown. It makes documents look nice with a minimal syntax. It's ideal for a Changelog.

It's also easy to integrate a Markdown page into your application. To display a markdown as in a .dotnet core web app, I used CommonMark. With a few lines of code I added a changelog to the project.

Here is the code.

@model Namespace.ChangelogViewModel

@{
    ViewBag.Title = "Changelog";
}

<div class="changelog container">
    <div class="row">
        <div class="col-md-8 col-md-offset-2">
            @Html.Raw(Model.Changelog)
        </div>
    </div>
</div>
public class HomeController : BaseController {
  
    private readonly IMarkDownToHtmlService _markdownService;

    public HomeController(
			IMarkDownToHtmlService markdownService,
			ILogger logger)
			: base(logger) {
			_markdownService = markdownService ?? throw new ArgumentNullException(nameof(markdownService));
    }

    [Authorize]
    public async Task<ActionResult> Changelog() {
        var vm = new ChangelogViewModel {
	Changelog = await _markdownService.ConvertMdFileToHtmlAsync(filePath: "~/Changelog.md").ConfigureAwait(false);
       };
	return View(vm);
    }
public class MarkDownToHtmlService : IMarkDownToHtmlService {

   private IFileService _fileService;

    public MarkDownToHtmlService(IFileService fileService) {
         _fileService = fileService;
    }

    /// <summary>
    /// Converts markdown to HTML
    /// </summary>
    /// <param name="filePath">Relative Server Path</param>
    /// <returns></returns>
    public async Task<String> ConvertMdFileToHtmlAsync(string filePath) {
    var serverpath = _fileService.ServerMapPath(filePath);
    using (var reader = new System.IO.StreamReader(serverpath)) {
        var fileContents = await reader.ReadToEndAsync();
	 return CommonMark.CommonMarkConverter.Convert(fileContents);
    }
  }
}

If you haven't added a changelog to your application take a few minutes and get started. Helpful document, even for developers :)

Over the years I have the privilege of helping several people get started coding. This is a short list of resources that I've found helpful in guiding others.

Courses & Lessons Pluralsight Udemy Codewars CodeKata

Online Reading Functional Programming – Wikipedia Object Oriented Programming – Wikipedia

Programming Help StackOverflow

Diving Deeper Software Craftsmanship Coding Horror Ploeh Blog – Software Design Teach Yourself Programming in Ten Years Separating Programming Sheep from Non-Programming Goats

In my last post I outlined creation of a 3D well plot with Helix Toolkit. In this post the original code will be refactored to include a two part tubular. The outer tube will represent the well bore, and the inner tube will represent the pipe in the well. Also, we will add a color gradient onto the tubing. Value sets can be mapped to the gradient to show something like temperature or pressures in a well. The refactored code is available in this Github Gist.

The Details

The data plotted in this 3D well viewer comes from a tubing forces torque and drag model. Force values are calculated at regular intervals of depth for tubing in the well. The outer well bore or casing is represented as a transparent glass tube. The pipe inside the well is the mapped gradient of force values (red to white).

Note: there is not a one to one mapping between well profile points and calculated forces. A well profile may be described by 20 or 30 data points describing the centerline of the wellbore. The torque and drag model may return several thousand data points for a length of pipe within the well. The data will need to be interpolated by depth to account for this.

Mapping Values as Texture Coordinates Helix toolkit uses the concept of texture mapping to apply a skin over the 3D objects. If you want to know more about texture mapping its explained in detail on [Wikipedia].

In this example, a linear gradient brush with values ranging from 0 to 1 is used. Values mapped to the brush will need normalized into the range of 0 to 1. Coordinates are given for where to apply the brush values on the geometry. Once a texture coordinates for each 3D point, we can databind them to our 3D plot in XAML

Get the Code: Github Gist

Here is a Github example project that contains all the code.

I've done a little work in the oil & gas industry. A common need in applications is to show a 3D plot of a well. My first rendition of a 3D well plot, I made in Excel. It was rather crude, and used a 3D to 2D orthographic transformation. Using this transform will let you plot a wireframe drawing onto a simple XY scatter plot type chart.

It's not beautiful or elegant but it works. But what if you want a more elegant plot? Something that looks a little better. If you're using WPF you have access to a decent 3D graphics rendering engine. Helix Toolkit gives you a little extra goodness. In this post I'll show you how I rendered a 3D well profile with Helix 3D toolkit.

Helix wraps the core WPF 3D functionality, to provide an extra level of sweetness and ease of use. One downfall of the project is the documentation. It is almost non-existent. But, the source code does have a great suite of sample applications. And as you should know, code samples are worth thousands of words :)

After looking through several of the 3D examples I was able to start piecing the chunks together. Helix support databinding making it simple to test your view-models. High level classes such as the Helix3DViewport provides panning, zooming, and rotation. This makes developing a sophisticated looking viewport very simple.

For my implementation of a well plot, I decided to have a small preview plot, and a larger window with 3D controls.

This larger window gives the user a more immersive 3D experience and a rich set of controls.

Get the Code: Github Gist

Issues: I did run into one issue. The preview plot uses one view instance. When a user clicks on a well, a new WellSurveyPlotViewModel is instantiated and the data context of the preview is updated. Opening the larger well viewer uses a window service to create a new window passing the WellSurveyPlotViewModel as its data context. The view refused to zoom to extents with the new camera information. After reading the source code I arrived at the idea of using an attached property to solve the issue. The following two lines, in an attached property hooked into a ReZoom boolean property in the preview view model solved the issue.

  viewport.Camera = viewport.DefaultCamera;
  viewport.ZoomExtents();

This toolkit is great! Using Helix, I was able to create the 3D well plot during a weekend of several short coding sessions. In an upcoming post I'll enhance the well viewer to provide a few more capabilities.

Enter your email to subscribe to updates.